How to Make a Map Using ArcGIS
Published:
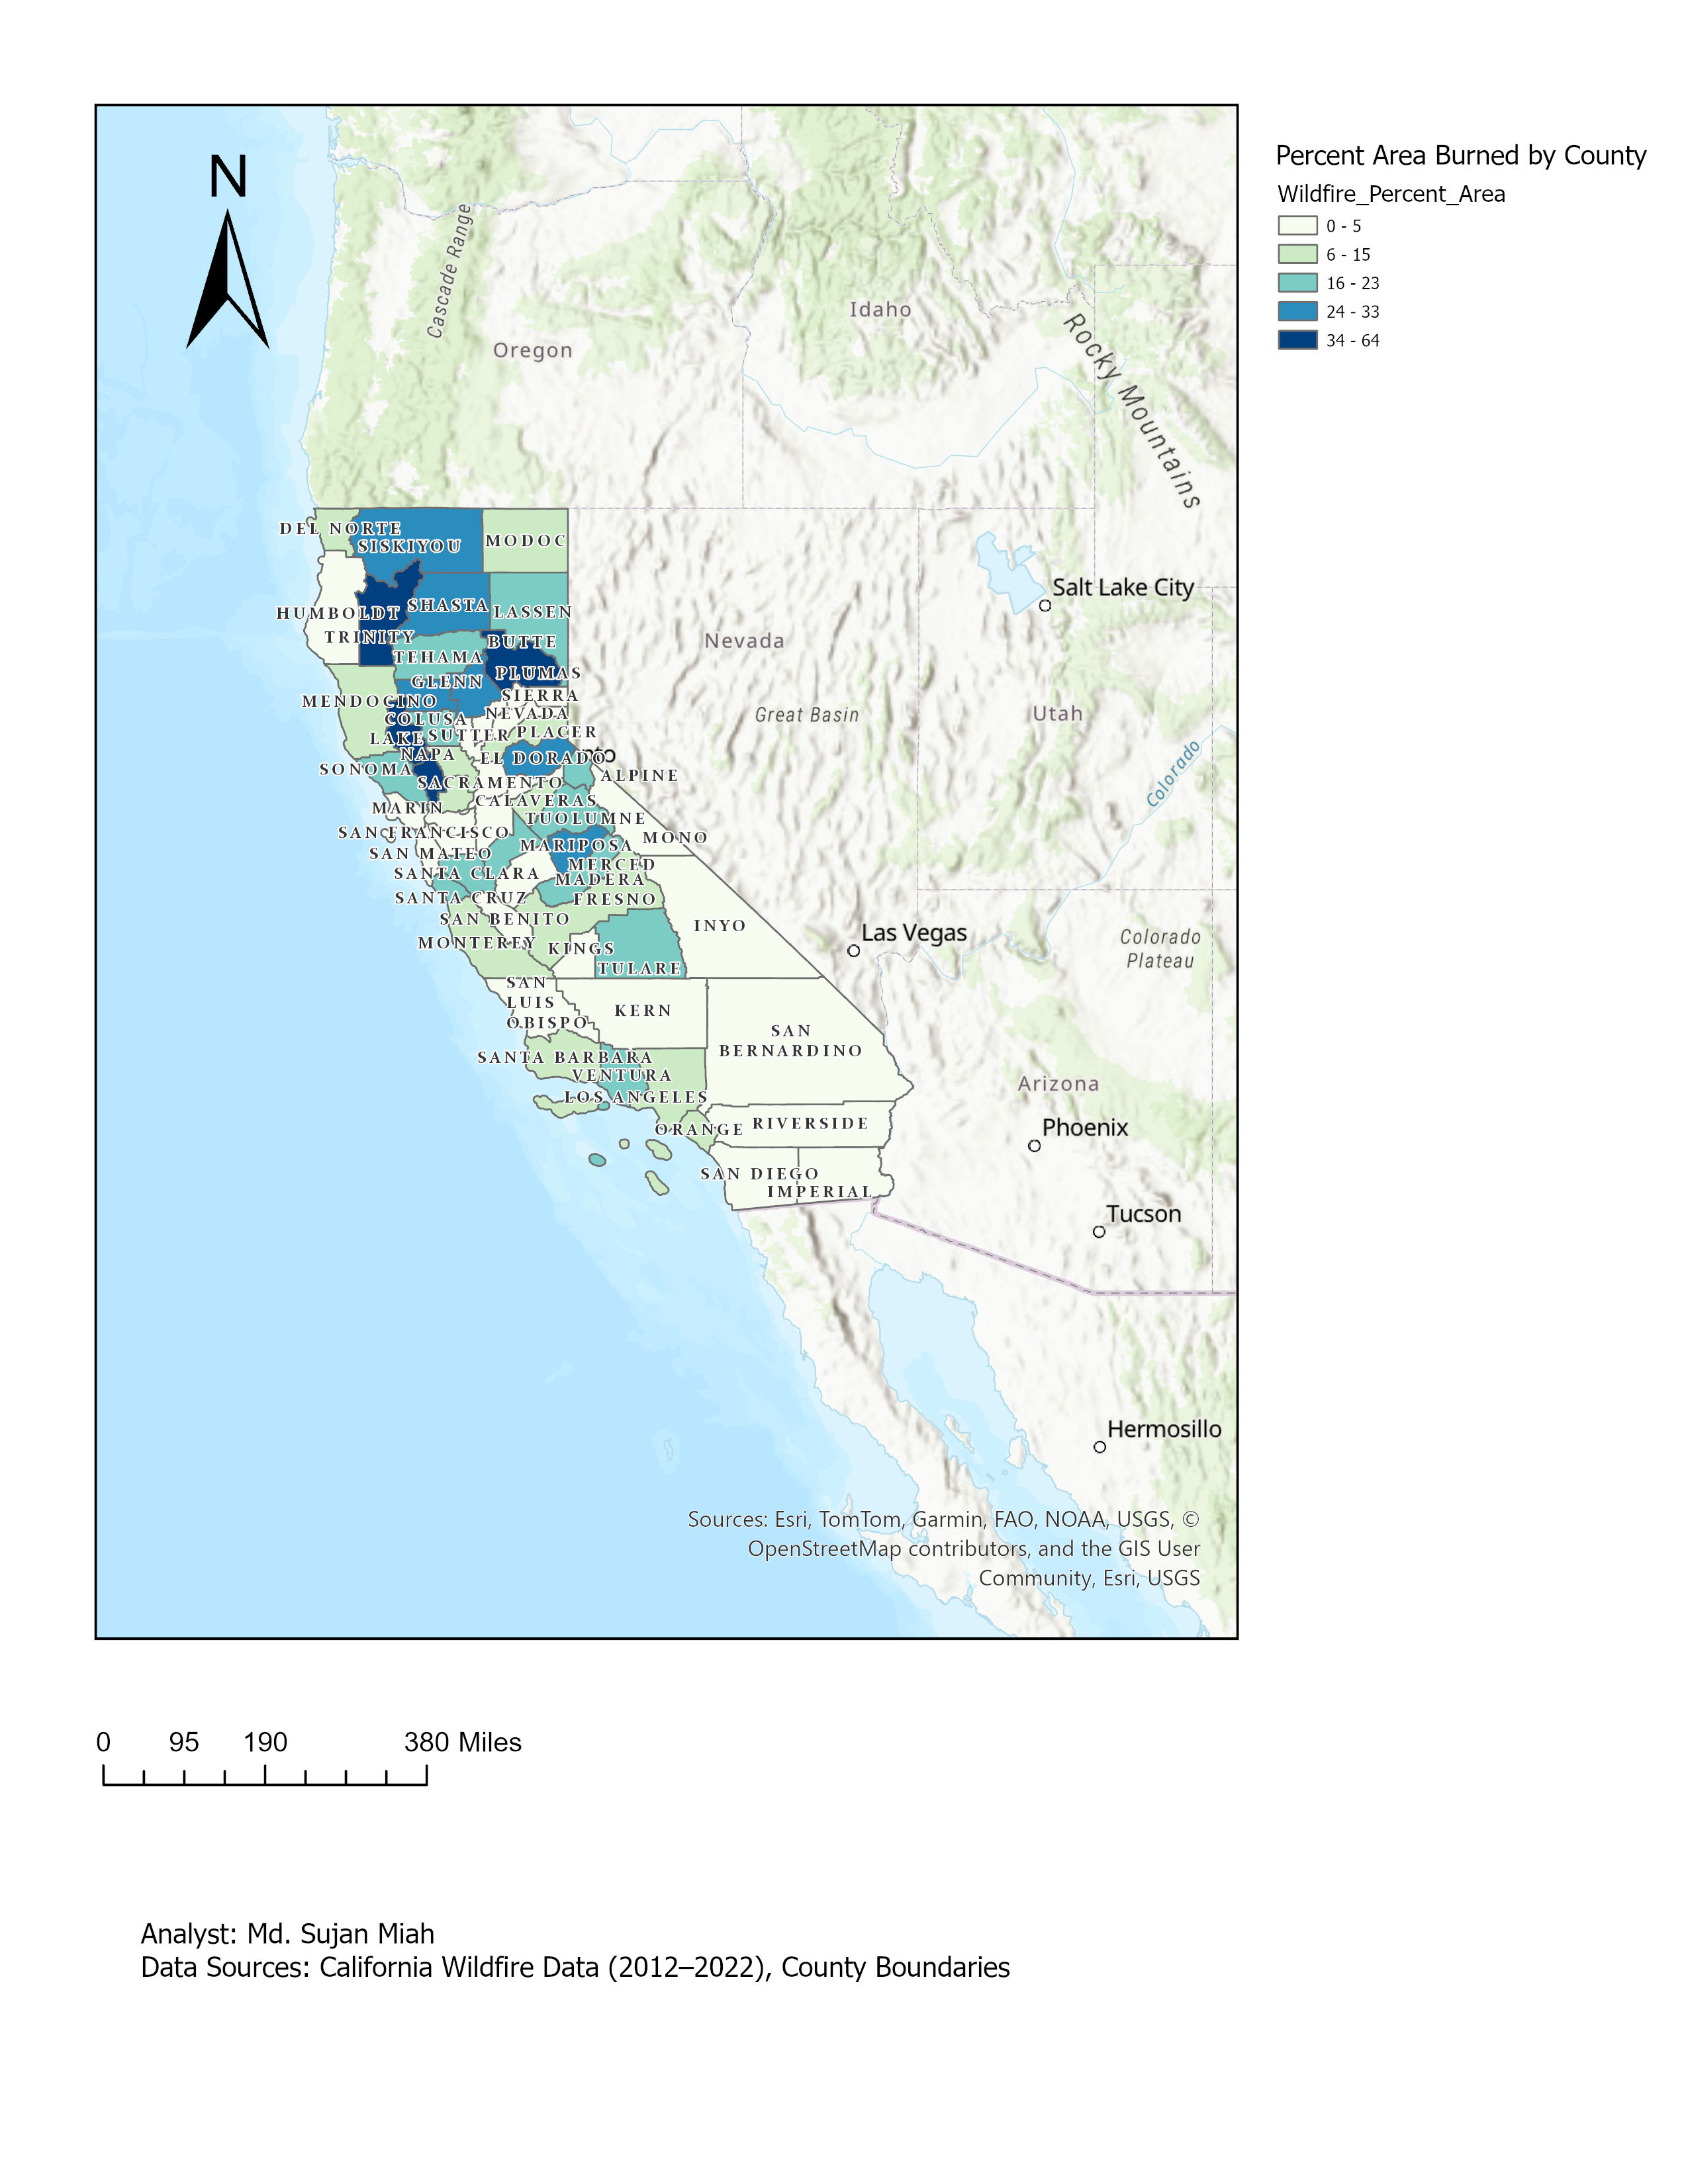
Creating a map using ArcGIS is a powerful way to visualize geospatial data and present it in a meaningful way. In this guide, we’ll walk through the process of creating a map, adding data layers, and customizing the display to suit your needs.
Introduction
ArcGIS is a comprehensive suite of software used for working with maps and geographic information systems (GIS). Whether you’re working with vector, raster, or tabular data, ArcGIS provides a range of tools that allow you to create maps, perform spatial analysis, and share your results.
In this guide, we’ll focus on the basic steps to create a map from scratch using ArcGIS, including data import, styling layers, and exporting the final product.
Steps to Create a Map Using ArcGIS
1. Prepare Your Data
Before you start creating your map, make sure you have the relevant data. ArcGIS supports a variety of data types such as shapefiles, GeoJSON, and raster data. You can download data from open sources like government portals or GIS data providers. Once you have the data ready, import it into your ArcGIS project.
2. Adding Data Layers
To add data layers in ArcGIS:
- Open ArcGIS and create a new project.
- Click on “Add Data” to import the layers you want to visualize.
- Choose the appropriate data format (e.g., shapefile, GeoJSON) and add them to your map.
3. Customizing the Map
Once your data is added, customize the map by adjusting the symbology, colors, and labels. ArcGIS provides extensive styling options to help make your map visually appealing and informative.
- Use the “Symbology” tab to change how data layers are represented.
- Apply different colors, patterns, or styles to make each layer stand out.
4. Adding Basemaps
ArcGIS provides several basemap options such as streets, satellite imagery, or topographic maps. These basemaps provide contextual information to enhance your data.
- In the “Add Basemap” menu, choose from a range of available basemaps to give your map more context.
5. Saving and Exporting Your Map
Once you’re satisfied with the map, you can save it as a project file or export it as an image or PDF for sharing.
- To export, click “File” > “Export Map,” and select your desired output format (e.g., PNG, PDF).
- You can also share your map online using ArcGIS Online or as a web map.
Features
ArcGIS provides several useful features for creating interactive and dynamic maps:
- Layer Control: Easily manage and toggle different map layers.
- Custom Symbology: Tailor the appearance of data layers based on specific attributes.
- Geospatial Analysis: Perform spatial analysis using built-in tools like buffer, overlay, and proximity analysis.
- Interactive Maps: Share your maps online and allow users to interact with the data.
Conclusion
Creating maps with ArcGIS allows you to visualize complex geospatial data in a way that is both informative and accessible. By following the steps outlined in this guide, you can create powerful, customized maps for various purposes, from urban planning to environmental monitoring.
Feel free to explore ArcGIS further, and experiment with advanced features such as spatial analysis and 3D visualization to take your mapping skills to the next level.